
Host an existing docs site
Build and host a Docusaurus, MkDocs, Sphinx or other generator site on Doxbrix, with the Ask AI assistant added on top.
Host documentation you already maintain with another generator, such as Docusaurus, MkDocs, or Sphinx, without moving it into the Doxbrix editor. Doxbrix builds your site as-is, hosts it, and adds the Ask AI assistant, which answers reader questions from your docs.
This kind of project is called a connected project. You keep writing in your own tools and repository; Doxbrix handles the build, hosting, and assistant. To write in the browser editor instead, see Create a project.
Before you begin
- Sign in to Doxbrix with a role that can create projects. See Roles and permissions.
- Have your documentation available in one of these forms:
- a GitHub or GitLab repository;
- a folder on your computer that contains the docs source;
- a zip of the already-built site, the folder that contains
index.html. - For a private repository, be ready to authorize Doxbrix once with GitHub or GitLab. Public repositories connect without any access.
Supported generators
Doxbrix detects your framework from its configuration file:
| Generator | Detected from |
|---|---|
| Docusaurus | docusaurus.config.js |
| MkDocs | mkdocs.yml (including Material) |
| Sphinx | conf.py (reStructuredText) |
| Hugo | hugo.toml (including Docsy) |
| VitePress | .vitepress/config |
| Markdoc | markdoc.config.js |
| Nextra | theme.config |
| Starlight | astro.config |
| Jekyll | _config.yml |
| Prebuilt static site | index.html in already-built HTML |
A prebuilt static site has no build step: Doxbrix hosts the files as they are and adds the assistant.
Choose a source
| Source | Use it when | What Doxbrix does |
|---|---|---|
| Git repository | Your docs live in GitHub or GitLab. | Builds from the repository and deploys it for you. |
| Local folder | Your docs source is on your computer. | Uploads the folder, builds it, and hosts it. The zipped folder can be up to 200 MB. |
| Upload a bundle | You already build the site yourself. | Hosts the built HTML from your zip. |
Create a connected project
On the dashboard, select New project. The What would you like to create? chooser opens.
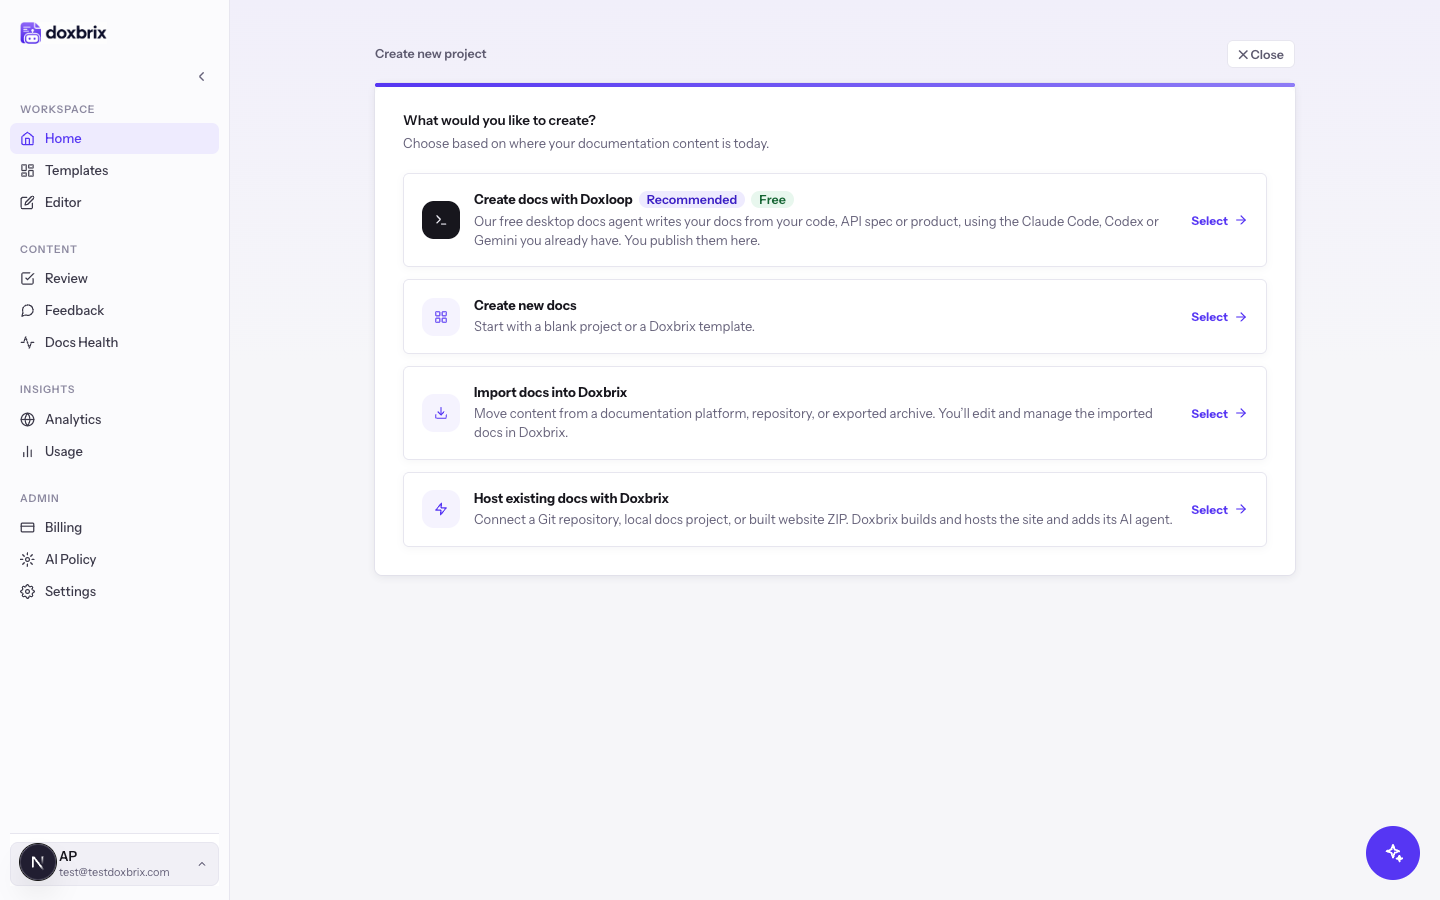
Select Host existing docs with Doxbrix. The Point us at your docs step opens with Git repository selected.
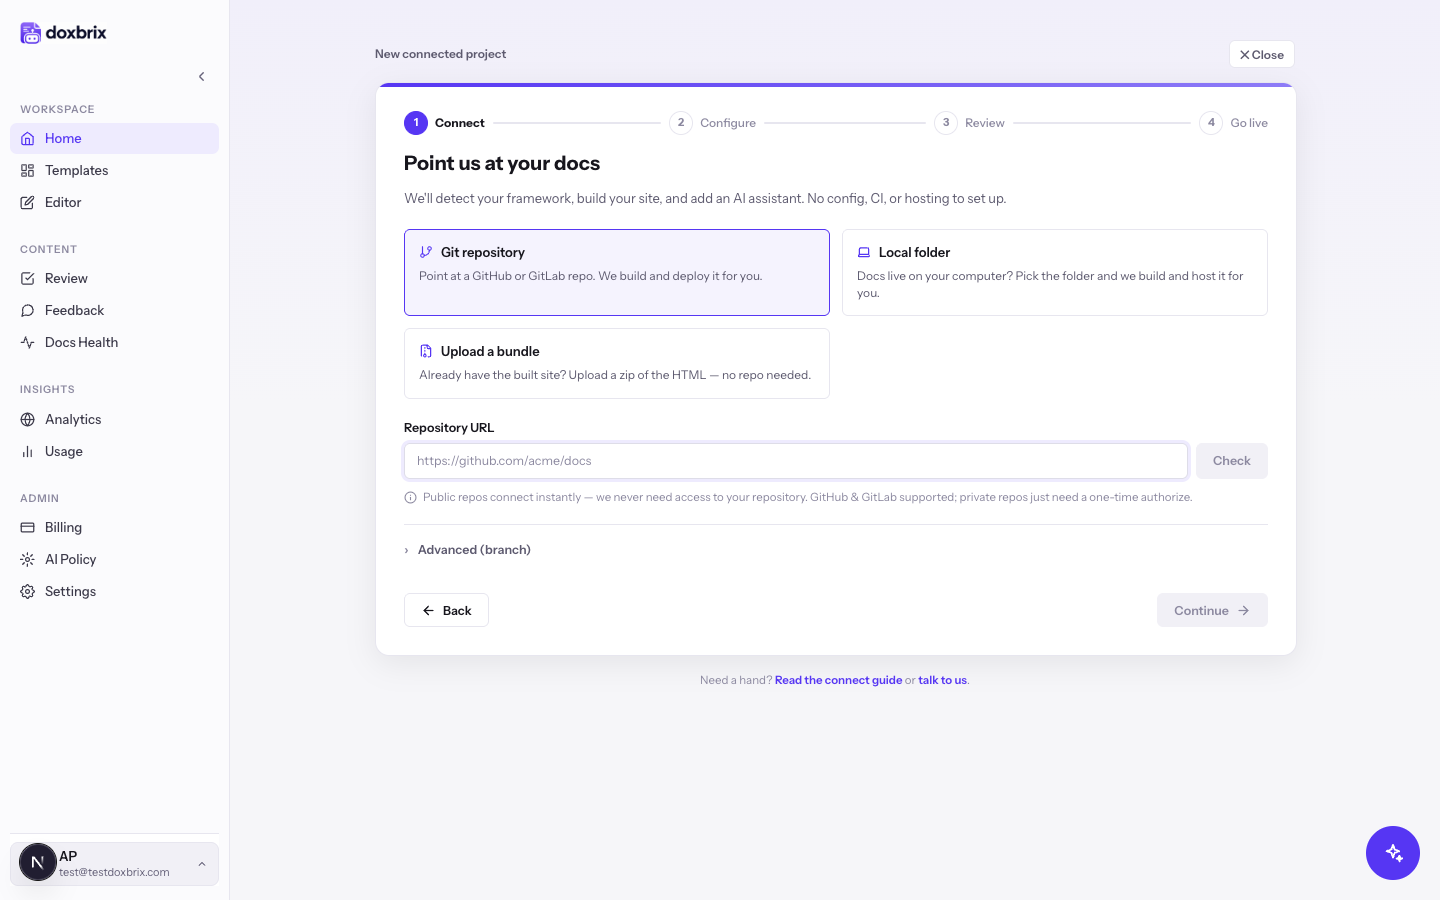
Choose the source that matches where your docs live.
- In Repository URL, enter your repository, for example
https://github.com/acme/docs. - Select Check. Doxbrix reports the repository, its default branch, and the detected generator, for example "Detected Docusaurus at the repository root — ready to go."
- If your docs live in a subfolder, select one of the suggested folders or use Where do your docs live? to pick it.
- To build from a branch other than the default, enter it in Branch.
Select Continue when Doxbrix has detected a generator or you chose Upload a bundle.
On Name it and set the vibe, enter a Project name, such as Acme Docs. The page shows the address where your site will live, in the form your-project.doxbrix.app.
Under Visitors see first, choose:
- Docs: visitors land on your documentation, and the assistant waits in the corner, one click away.
- Assistant: visitors meet the AI assistant on arrival and can open the docs at any time.
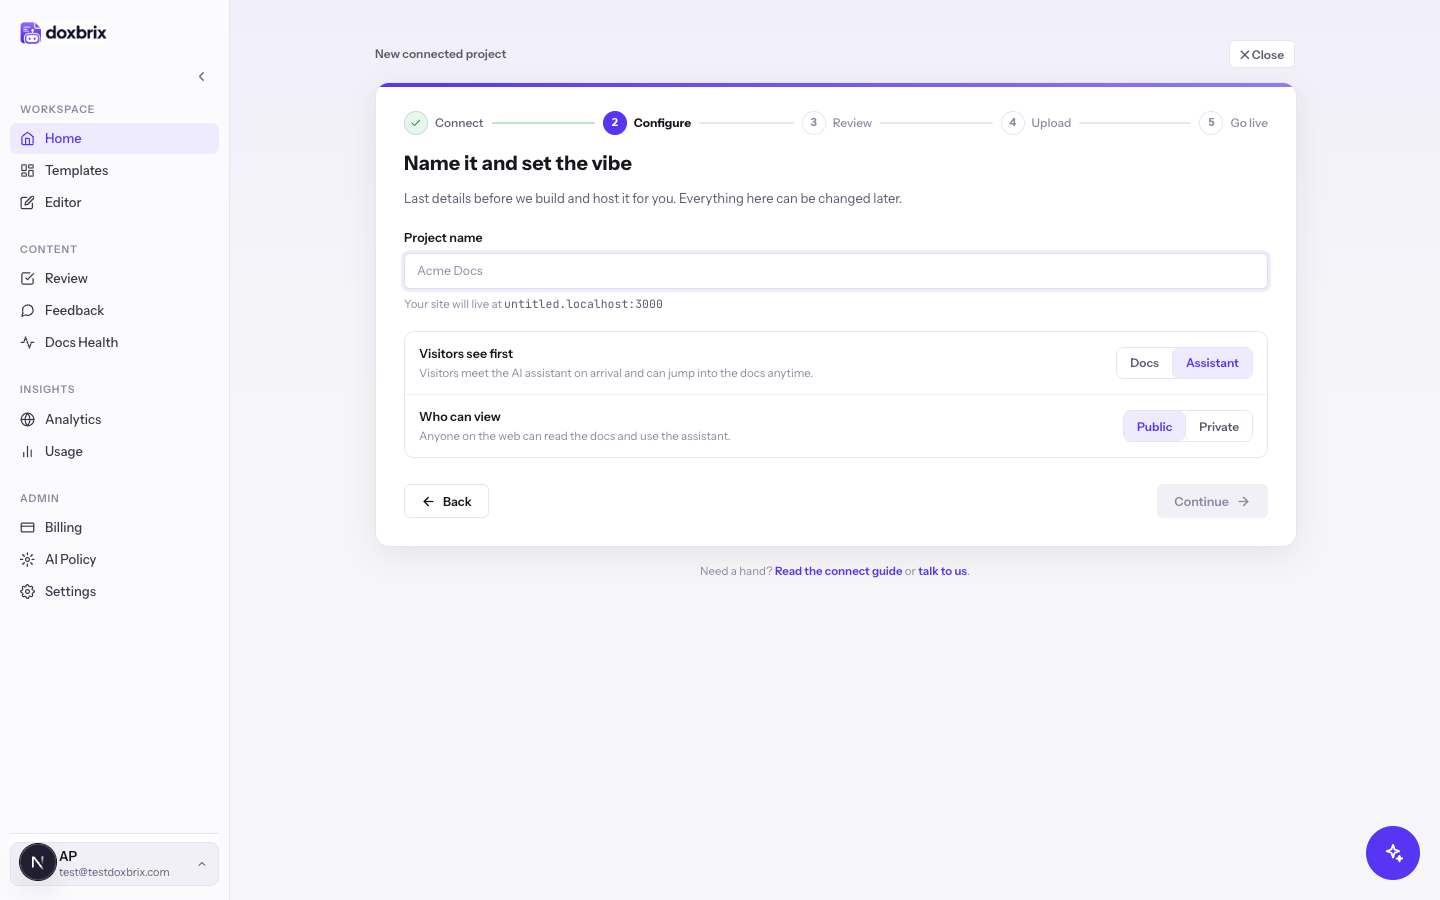
Under Who can view, choose Public so anyone on the web can read the docs and use the assistant, or Private so only workspace members can. You can add password, email-domain, or SSO access to a private site later. See Make a site private.
On Review & build, check the summary, including Visitors see first and Visibility.
- For a public Git repository, select Build & go live. Building takes about a minute.
- For a private site, a local folder, or a bundle, select Continue to finish the remaining step.
Complete the step that matches your source:
- Local folder: on Deploy your folder, deploy the folder you chose. Doxbrix uploads the source, builds it on its servers, and puts the site live.
- Upload a bundle: on Upload your site bundle, drop the zip of your built site, for example your
build,public,site, ordistfolder, and upload it. - Private: on Who can read these docs?, choose how readers sign in.
Verify
When the build finishes, the setup shows "Project name is live" and confirms that your docs are hosted, indexed, and that the assistant is answering questions.
Each build also publishes /llms.txt and /llms-full.txt so AI tools can read your documentation.
Adjust the site after launch
Open the project's settings from its dashboard card to change how the hosted site behaves. Connected projects have these sections:
| Section | What you can change |
|---|---|
| Basics | Name, description, icon, and status. |
| Deployments | Deploy history, instant rollback, build logs, and auto-deploy on push. |
| Site experience | Docs-first or agent-first landing, Ask AI button placement, and page feedback. |
| Domain & hosting | Your own domain over HTTPS. |
| Agent theme | Colors, fonts, and icons for the assistant. |
| Support handoff | Routing visitors to a human when the assistant can't resolve something. |
| API keys & embed | Embedding the assistant elsewhere or calling it from the API. |
In Site experience:
- Readers land on switches between Docs first and Agent first.
- Button placement switches between Floating button, themed with your site's primary color, and Header link, which adds an Ask AI link to your site's own navigation bar. On pages without a recognizable header, the header link falls back to the floating button.
- "Was this page helpful?" shows a feedback prompt on your live pages. Votes and comments feed your analytics and the Docs Health board.
Troubleshooting
For more build and hosting problems, see Troubleshoot sites, domains and reader access.