
Invite and manage members
Invite teammates by email or create their accounts directly, assign roles, and suspend, reactivate or remove workspace members.
Add teammates to your Doxbrix workspace so they can write, review or read your documentation. This guide shows you how to send an email invitation, create an account with credentials, and later change a member's role, suspend them or remove them.
Every member has one workspace role: Owner, Admin, Editor or Viewer. The role decides what they can do and whether they use a paid editor seat. See Roles and permissions before you choose.
Before you begin
- Role: By default, only workspace Owners and Admins can invite members. The Default invite restriction in Security basics can narrow this to Owners only or widen it to include project Owners. See Configure workspace settings.
- Creating accounts with credentials, changing roles, suspending and removing: workspace Owners and Admins only.
- Seats: Owner, Admin and Editor members each use an editor seat. Inviting or creating one of these roles fails when your plan has no editor seat left. Viewers do not use an editor seat. See Plans and limits reference.
- Allowed domains: If Allowed email domains lists any domains, you can invite only addresses in those domains.
Invite a teammate by email
In the sidebar, select Settings, then select Members & Invitations under People & access. The page shows the Invite teammates form, the Roles & access guide, the Workspace members table and Pending invitations.
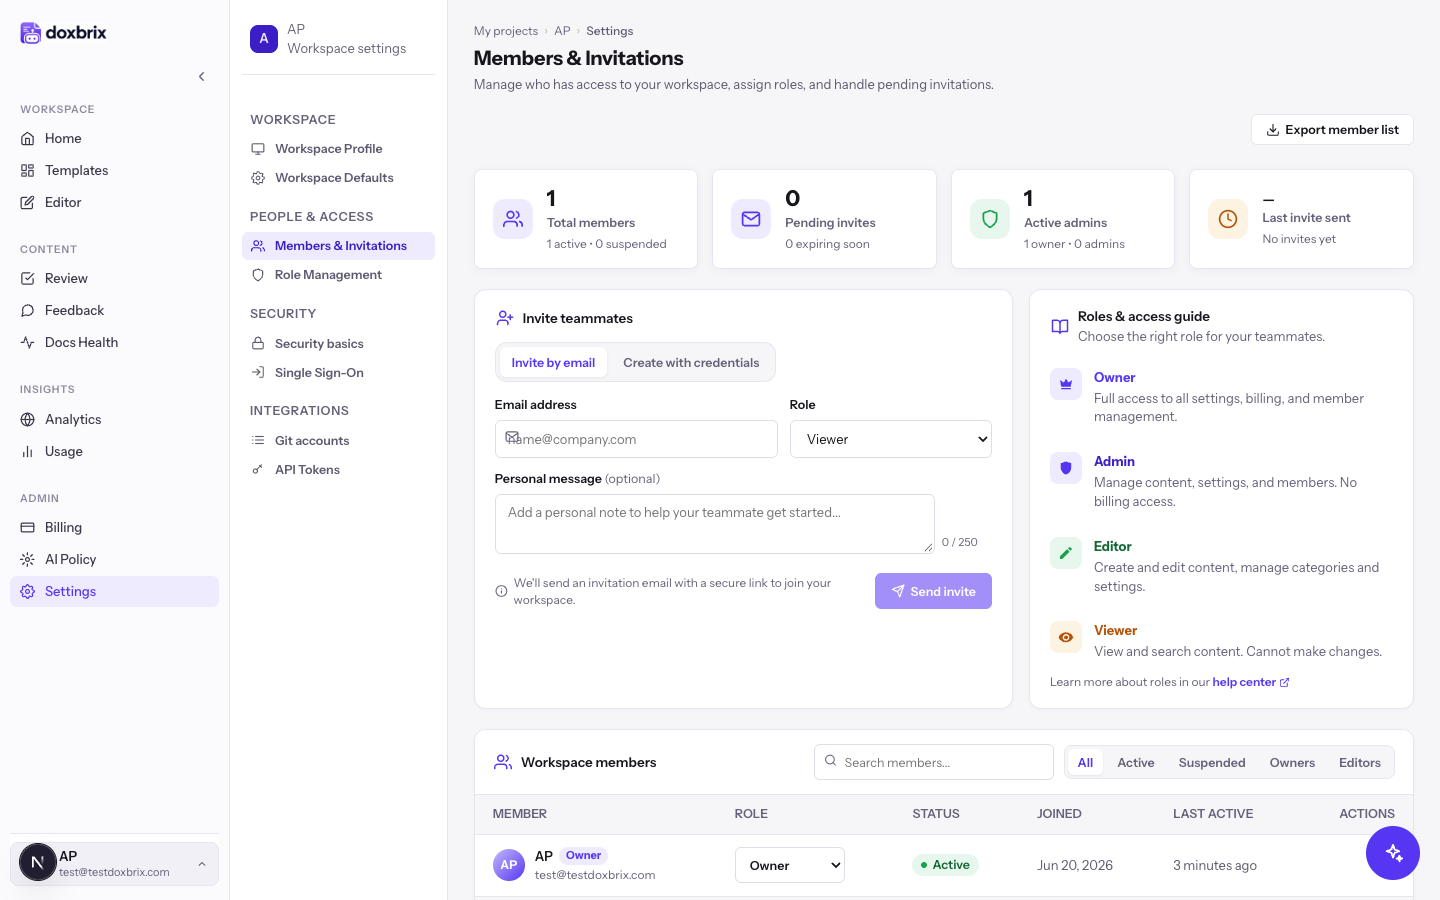
Make sure the Invite by email tab is selected. In Email address, enter the teammate's work address, for example teammate@example.com.
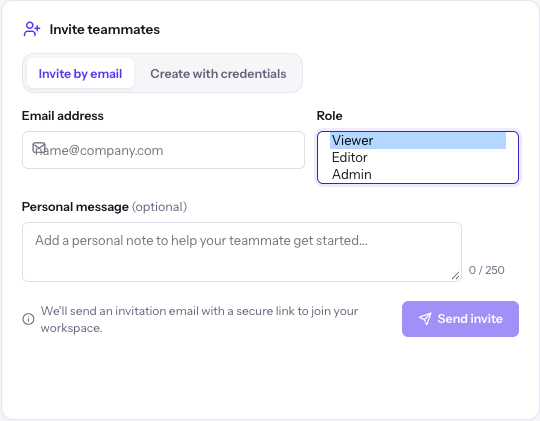
Open Role and select Viewer, Editor or Admin. Viewer is selected by default. Choose Editor for people who write and review content, and Admin for people who help manage the workspace. Only Owners can grant the Admin role.
Optionally, in Personal message (optional), add a note of up to 250 characters, for example Welcome! Start with the PocketBase docs project. The counter below the field shows how many characters you have used.
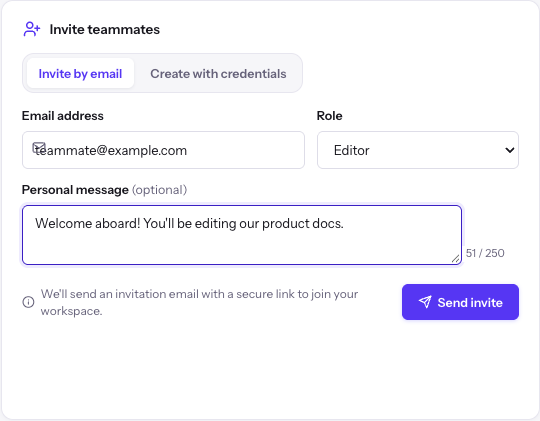
Select Send invite. Doxbrix shows Invitation sent. and emails the teammate a secure link to join your workspace. The invitation appears under Pending invitations with its Invited role, Invited by and Expires values.
Invitations expire after 7 days. Sending a new invitation to the same address replaces the earlier one and resets the expiry.
What the invitee sees
The link opens a Workspace invite page titled Join followed by your workspace name, stating who invited them and with which role.
- If they are signed in with the invited address, they select Accept invite.
- If an account already exists for that address, they select Sign in to continue.
- If they have no account, they select Create account to continue. See Create an account and choose a plan.
The invitation can be accepted only by the invited email address. Someone signed in with a different address sees This invite is for teammate@example.com. Sign out first and continue with that address.
Create a member with credentials
Use this when a teammate cannot receive email, or when you want the account to exist immediately. Only workspace Owners and Admins can do this.
In Invite teammates, select Create with credentials.
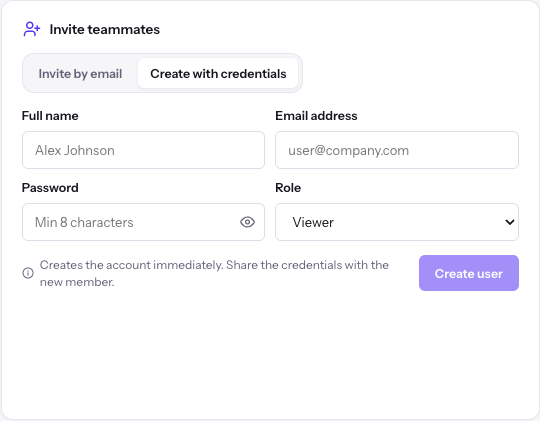
Fill in Full name (for example, Alex Johnson), Email address (for example, alex@example.com), Password (at least 8 characters) and Role. Select Show password to check what you typed.
Select Create user. Doxbrix shows User created and added to workspace. and the member appears in Workspace members. Share the credentials with the new member through a secure channel, and ask them to change the password after they sign in. See Manage your profile and account security.
Manage existing members
The Workspace members table lists each member with their Role, Status, Joined and Last active values. Use Search members... and the All, Active, Suspended, Owners and Editors filters to find someone. Select Export member list to download the list as a CSV file.
| Task | How | Result |
|---|---|---|
| Change a role | Choose a new role in the member's Role column, then confirm with Change to and the role name. | Permissions update immediately across the workspace. |
| Suspend a member | Select Suspend, then Suspend member. | The member loses access until reactivated. Their membership and project assignments remain. |
| Reactivate a member | Select Reactivate, then Reactivate member. | The member regains access with their previous role and project assignments. |
| Remove a member | Select Remove, then Remove member. | The member leaves the workspace and loses their direct project memberships in it. |
| Revoke a member's sessions | Open the row's action menu, select Revoke sessions, then confirm. | The member is signed out of active sessions. |
| Check a member's role changes | Open the row's action menu and select View role history. | Their role history is shown. |
Admins can manage Editors and Viewers. Only Owners can change, suspend, reactivate or remove an Admin, or grant the Owner or Admin role. An Owner cannot be suspended or removed from this page.
Manage pending invitations
Under Pending invitations, filter by All, Expiring soon or Expiring later. For each invitation you can:
- select Resend to send the invitation email again;
- copy the invitation token with the copy control in Invitation token;
- select Revoke, then Revoke invite, to cancel it. Doxbrix shows
Invitation revoked.and the link stops working.
Approve members who signed in with SSO
When single sign-on is set up, people from your identity provider can sign in before anyone assigns them a role. They appear with a Pending status and cannot access the workspace yet. Select Approve to grant Viewer access (Approve as Viewer), choose a higher role in the Role column to approve and assign it in one action, or select Deny access to refuse. See Set up single sign-on.
Verify
- The new member appears in Workspace members with the expected role and an Active status after they accept the invitation or after you create the account.
- Role Management > Recent role history records each role change.
Troubleshooting
| Symptom | Cause | Fix |
|---|---|---|
Your role cannot invite members under the current workspace invite policy | The Default invite restriction does not include your role. | Ask an Owner to send the invitation or to change the restriction in Security basics. |
That email domain is not in the workspace allow-list | The address is outside Allowed email domains. | Invite an address in an allowed domain, or ask an Owner or Admin to add the domain. |
That email is already an active workspace member | The person is already an active member. | Change their role in Workspace members instead. |
| The invite fails with a plan-limit message | Owner, Admin and Editor roles need a free editor seat. | Invite as Viewer, remove an unused editor, or upgrade. See Manage billing and change plans. |
Only owners can grant owner or admin access | Admins cannot grant these roles. | Ask a workspace Owner to make the change. |
The invitee sees This invitation has expired. Ask the workspace admin to resend it. | More than 7 days passed since the invitation was sent. | Select Resend under Pending invitations, or send a new invitation. |
For more sign-in and invitation problems, see Troubleshoot sign-in, invitations and SSO.